InstaHub
3D Product Visualization & Commercial Photography
2022 · Client Work
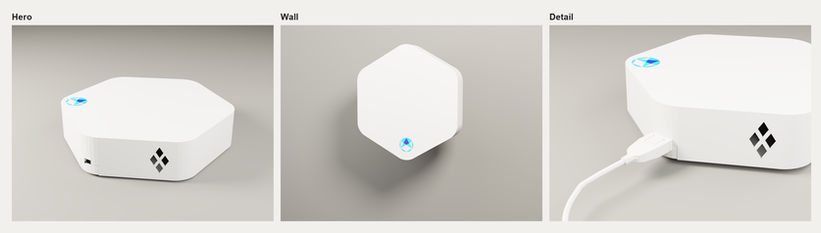
A product-visualization project that began with commercial photography and expanded into 3D. Working from a physical sample, I photographed the device in real environments and rebuilt the existing product in Blender to create controlled product imagery alongside the location work.
Role: Commercial Photography, 3D Modeling, Materials, Lighting, Rendering, Compositing & Retouching
Tools: Blender, Photoshop

The Assignment
The original request was straightforward: photograph the physical product.I handled the photographic workflow from staging and camera work through lighting and retouching, photographing the device in a range of real environments. The product itself and the existing InstaHub branding were supplied by the client.As the project developed, the need for more controlled product-only imagery pushed the workflow beyond photography alone.

Original physical-product photography from the 2022 project.
The Visual Challenge
The product's pale enclosure was deceptively difficult to photograph. Against light walls and studio surfaces, its edges, depth, and subtle structural details could disappear quickly.Working freelance also meant I no longer had access to the same full commercial-studio lighting and grip setup I had used as a studio photographer. I could still photograph the product effectively in real spaces, but producing the tightly controlled product-only look I wanted was less efficient with the equipment available.

Switching the Production Method
Rather than force photography to solve every presentation problem, I expanded the project into Blender.My photography background helped define exactly what needed to change: lighting direction, contrast, camera angle, edge separation, and the way highlights described the enclosure. In 3D, those same variables became precise and repeatable.The two mediums ended up doing different jobs well: 3D gave me control over product-only presentation, while photography kept the device grounded in believable real environments.


3D Product Visualization
Using the physical product as reference, I rebuilt the existing device from scratch in Blender and handled the modeling, materials, lighting, camera, rendering, compositing, and retouching.For this portfolio presentation, I returned to the original 2022 model and created a small set of 2026 re-renders with cleaner lighting and stronger separation between the product's pale surfaces.The hardware design and branding remain the client's original work; the refresh is strictly a new presentation of my original 3D model.


Product in Context
The 3D renders handled controlled product presentation; the photography handled something different: real spatial context.I photographed the physical device across working and public environments, using the existing architecture, available light, and product placement to show how a small piece of hardware could sit naturally within very different spaces.Keeping both approaches in the project made the final visual system more flexible than relying on either medium alone.


Real Client Use
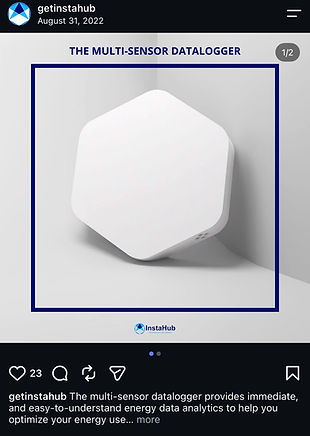
The final visual assets were used in InstaHub's public-facing website and Instagram content.


Reflection
This project reinforced a working method I still value: I do not treat a medium as the boundary of the problem.Photography, 3D, lighting, and retouching can function as one connected production system. When one method introduces a practical limitation, I can move into another discipline without losing the visual logic that made the first one useful.For InstaHub, photography gave the product real context. 3D gave me controlled presentation. The strength of the project came from using both.